When the PlayStation 5 originally released in late 2020, there were some discussions around its 825 GB SSD and whether it would be adequate, especially considering you only get about 667 GB of usable storage space. Some games now require over 100 GB of storage, if not more, like with the upcoming Final Fantasy VII Rebirth, which needs 150 GB. Fortunately, the PlayStation 5 makes storage expansion easy with a built-in expansion slot that can accommodate M.2 SSDs of various sizes. If you’re considering adding another SSD to expand your original PlayStation 5’s storage, this guide will be useful.
The following steps are for the original PlayStation 5, although the newer, slimmer version isn’t too different. Before starting, you’ll want to properly shut down your console and unplug all cables. Work on a clean mat and touch a metal-grounded object to discharge any static electricity from your body. You’ll need a #1 Phillips or cross-head screwdriver. If necessary, let your PlayStation 5 cool down before starting the work. The entire process to add an SSD to your original PlayStation 5 should take about 10 minutes in total.
1. Remove the Bottom Panel

First, place your PlayStation 5 upside down on a flat surface, with the PlayStation logo facing down and the power button towards you. Gently grasp the top left corner of the cover and lift it up slightly; this shouldn’t require much effort. Then, slide it to the right, and the cover will come off.
2. Remove the Expansion Slot Cover

Once the cover is off, you’ll notice the expansion cover located at the bottom of the console. This cover is secured by a single screw at the top. Remove this screw to take off the expansion cover.
3. Remove Screw and Spacer

After removing the expansion cover, take out the screw and the spacer located beneath it. Position the spacer in the groove that corresponds to the size of your M.2 SSD.
4. Place Spacer in Correct Location

For our PlayStation 5, we chose the Samsung 990 PRO 1TB SSD with Heatsink, so we moved the spacer to the “80” slot.
5. Get Your SSD Ready

You’re now ready to install the new SSD. Start by removing it from its packaging. While there are numerous options available on the market, ensure that your chosen SSD is compatible with the PlayStation 5. We opted for the Samsung 990 Pro with Heatsink, primarily for its reliability and speed.
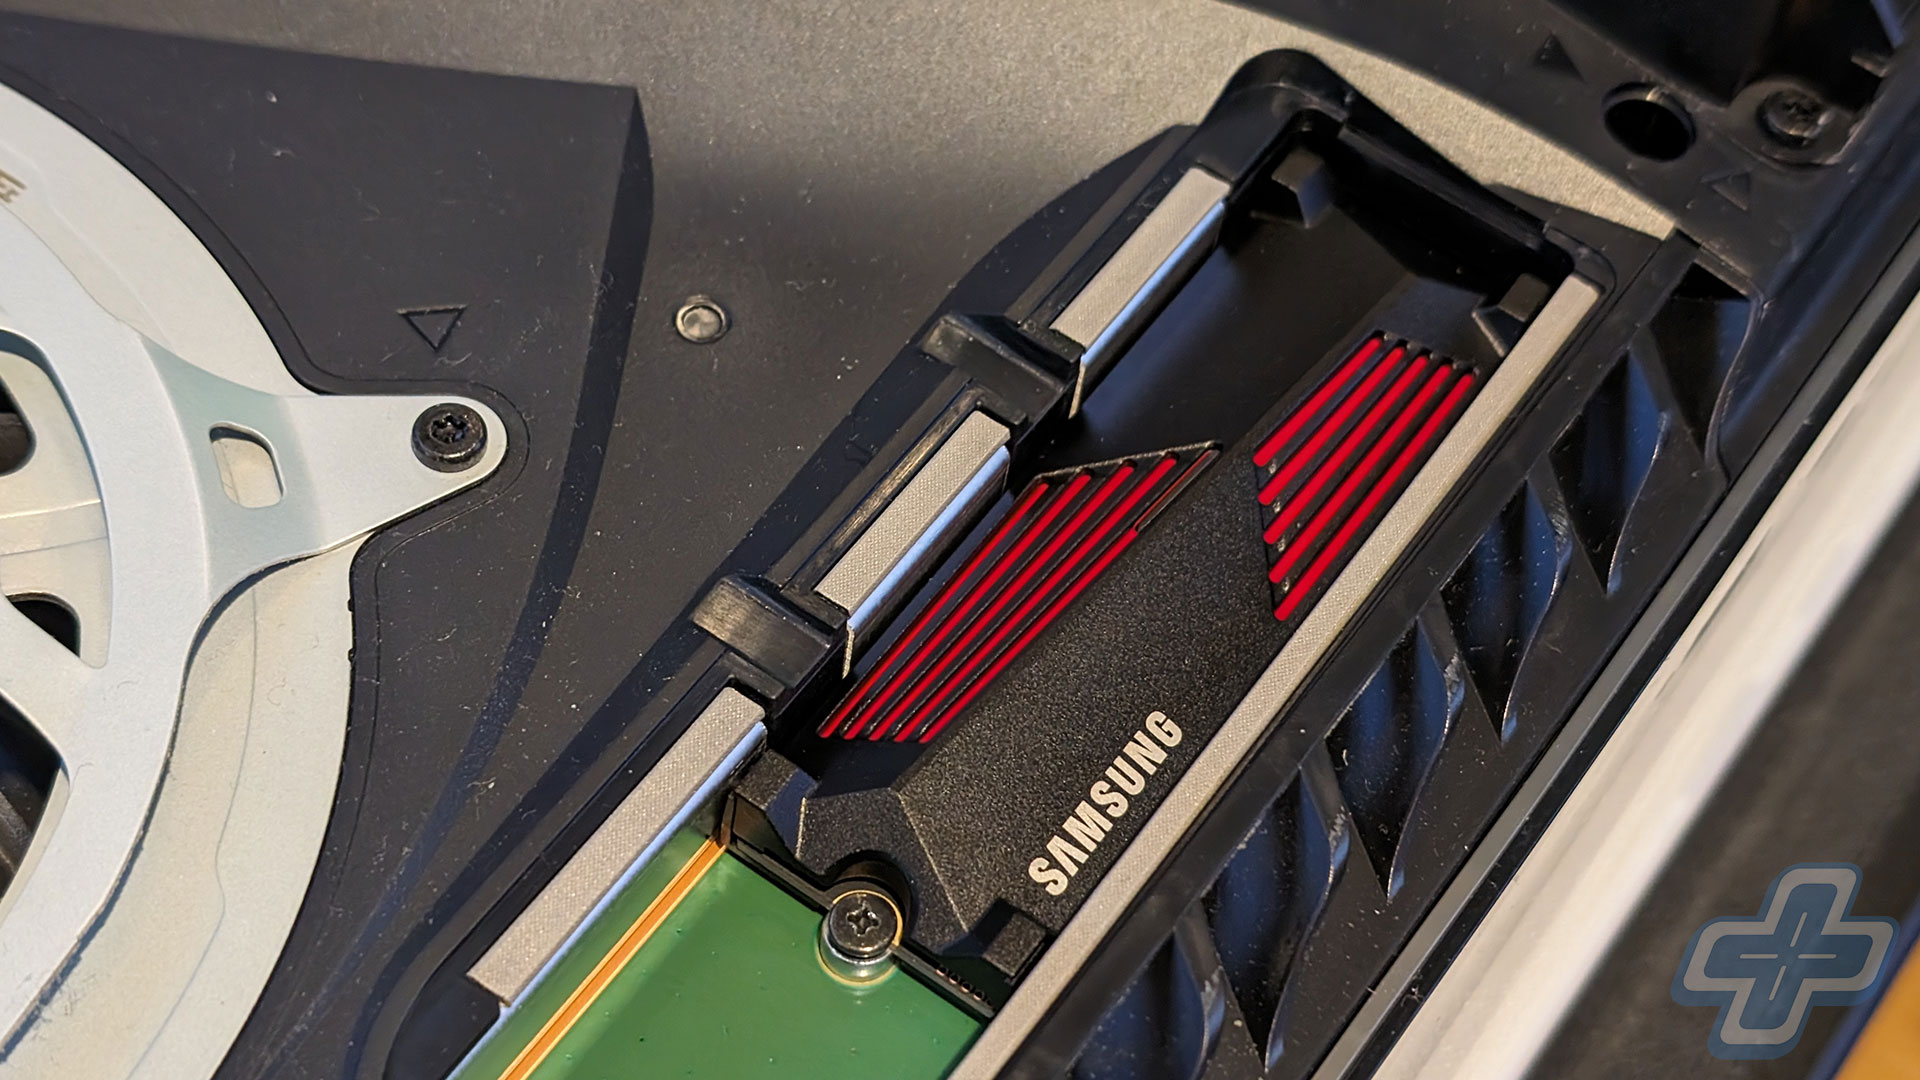
6. Carefully Insert SSD into Connector

Hold the edge of your SSD, align it with the notch on the connector, and insert it at a diagonal angle. Make sure the SSD sits flush on the spacer and is not obstructed by the cooling structure.
7. Install Screw and Reassemble

Once you’ve verified everything is correct, tilt the SSD down and secure it to the spacer using the screw. Again, ensure that the cooling structure does not obstruct the screw. Then, reattach the expansion slot cover and replace the PlayStation 5’s cover. If you run into issues getting the expansion slot cover to fit properly, it’s likely the cooling structure on your SSD is too big.
After reconnecting everything and powering up the PlayStation 5, follow the on-screen instructions to format the SSD, so it can start storing those massive PlayStation 5 games.